The anticipation of your new project heading off to print can be exciting. But the satisfaction of getting the new flyer or letterhead off your to-do list is short-lived if you get a message back from the printer, requesting changes to your file.
We get it. Whether it's having a creative employee or family member who can design something suitable for your project, or if you are trying to work with a limited budget - you can't always have us set up your files. So if you're trying to DIY, we've put together this guide for you to navigate how to set up your print file for success.
So, what is a print-ready file?!
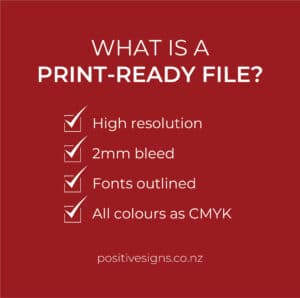
When Positive Signs + Print asks you for a print-ready file, what we are looking for is:
A high resolution PDF documentWhy PDF? With so many different design programs out there, the PDF format is our first and only choice for the best format to supply your format in. No matter what program you've used, typically any PDF will remain editable so we can make any adjustments at our end if necessary. Ever opened up someone's Word Doc and the formatting is all weird? Yeah, that happens a lot for us.Why High Resolution? The higher the resolution, the better the detail. Bigger is always better! We want the end result to be as good as possible for you.
The document should have 2mm bleed on all edgesWhy? During the printing process, paper movement can occur, therefore it is important that your file contains bleed. 2mm is usually what we need but if you supply a file with more, that's absolutely fine. More information on what bleed is can be found here.
*sometimes we will request bleed of 3, 5, 10 or 50mm depending on the print method and materials being used.
All fonts outlined (preferably)
Why? Also known as "converting to paths", outlining the fonts in your files will ensure that there are no conflicts with fonts installed on our computers. If you can't figure out how to do this, that's ok - just leave it. But do be sure to triple check your printed proof carefully, in case any gremlins appear!
All colours as CMYK Why: CMYK is the colour process used for digital printing. Most images taken by digital cameras are RGB, which is a colour process for digital display. If RGB colours are used, they are automatically converted to CMYK by our printing software. However there may be a shift in colour as RGB colors do not convert precisely to CMYK, so we always recommend converting your images to CMYK so that you don't have any surprises.
Download your Canva Files to be Print-Ready
A lot of clients come to us with Canva files. These can be suitable, as long as you download your files with the right settings.
When you start your design, turn on the print bleed setting. This will allow you to "bleed" items off your page (here's why bleed is so important).
How to Set up Your Canva Document For Printing
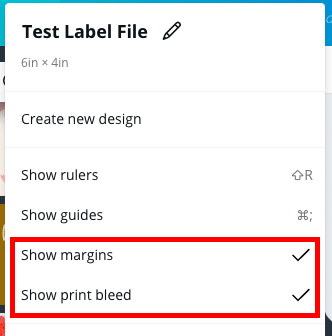
Click on “File” in the top left corner of your screen.
We recommend you select "Show Margins" and “Show print bleed.”
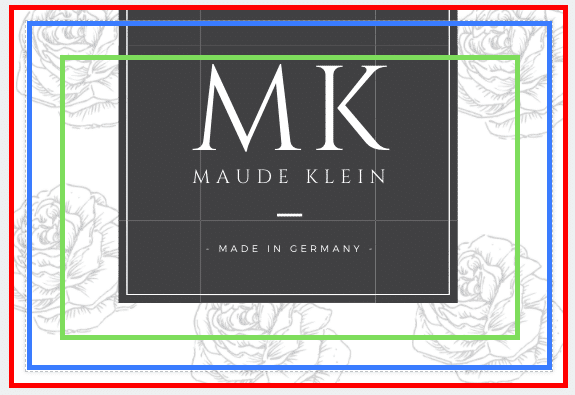
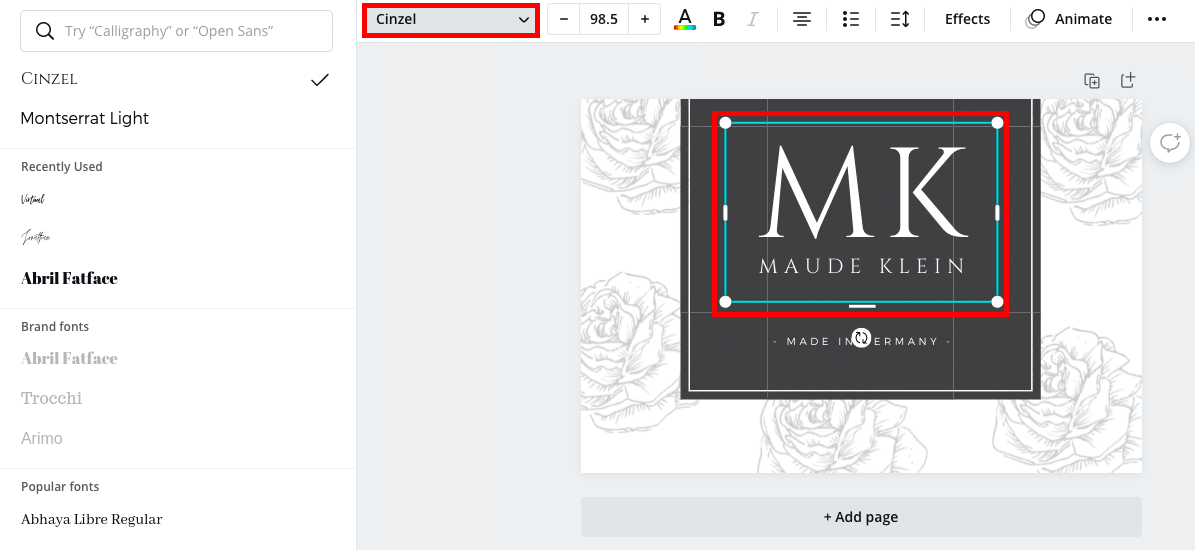
Extend the images and coloured panels to fall outside of the bleed line to ensure your document does not have a white stripe along the side of your page. To help illustrate these different lines - the red line is the outside of the bleed. Sitting between the red and blue line is a bit of breathing space for when your file is trimmed to size. The blue line is the "trim line", the final size of your file. The green line is the margin. Between the green and blue line, avoid having any text or important details - they should be within the green box.
A note on converting text to paths (aka outlining your fonts)
We mention above that all text needs to be converted to outlines–otherwise, they are at risk of changing to a different font, or not appearing at all when we open the file. Unfortunately this is not a function available in Canva.
However, Canva mostly uses Google Fonts. Note each font used in your design and let us know what they are when you place your order. If there are any issues, we can download the font file from Google Fonts and try to resolve any issues that way.
Download Settings for your Canva Document to be print-ready
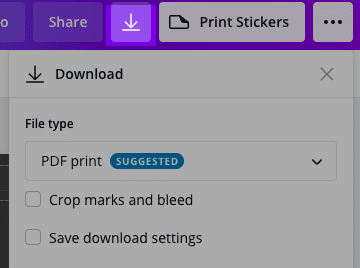
At the top right of your design, click the Download/arrow pointing downwards button
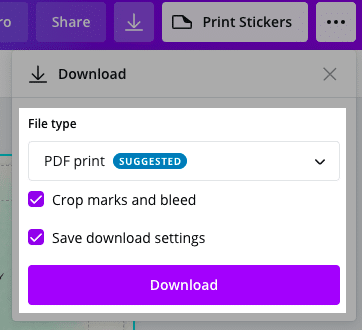
Make sure that "PDF Print" is the selected File Type, and check off "Crop marks and bleed" and "Save download settings" (makes it faster for you to do this at a later date)
Click “Download”
The file that downloads is the print-ready file that you should provide.